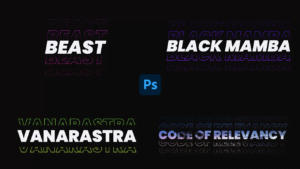
Creating a glow effect in Photoshop is a fun and easy way to add some visual interest to your images. This effect can be used to highlight specific areas of an image, or to create a more cohesive look throughout the entire image. It’s a simple technique that can be achieved with just a few steps.
To begin, open your image in Photoshop. You will need to start by selecting the area of the image that you want to apply the effect to. You can do this by using the Lasso tool, Pen tool or the Marquee tool, depending on the shape and size of the area you are working with.
Duplicate the layer by going to Layer > Duplicate Layer. You can also hold down the Ctrl + J keys to duplicate the layer. This will give you a separate layer to work on without affecting the original image.
Next, go to Filter > Blur > Gaussian Blur and apply a moderate amount of blur to the duplicated layer. This will soften the edges of the image and help create the glow effect. Further more, You can increase the luminosity of the area by moving the slider towards the right. You may also want to increase the saturation slightly to give the glow a more vibrant look. Once you are happy with the changes you have made, click the “OK” button to apply the effect.
Then, go to the Layer menu and select the “New Adjustment Layer” option. From the list of adjustment layers that appears, select “Hue/Saturation.” This will open a new window where you can adjust the hue, saturation, and luminosity of the selected area.
You can also use the Layer Styles menu to create a more advanced glow effect. To do this, go to the Layer menu and select “Layer Styles.” From the list of options that appears, select “Outer Glow.” This will open a new window where you can adjust the size, color, and intensity of the glow.
You can use the sliders and color picker to customize the glow to your liking. Once you are satisfied with the effect, click the “OK” button to apply it to the selected area of your image. You may need to experiment with different settings to get the desired look, but the beauty of Photoshop is that you can easily adjust and fine-tune the effect until you are satisfied with the result.
To further enhance the glow effect, you can also add a subtle blur to the layer by going to the Filter menu and selecting “Blur.” This will help to give the glow a softer, more natural look.
Finally, set the blending mode of the duplicated layer to “Color Dodge”. You can also adjust the opacity of the layer to fine-tune the intensity of the glow.
And that’s it! With just a few simple steps, you can easily create a glowing effect in Photoshop. Experiment with different colors and intensities to find the perfect look for your image.
In conclusion, creating a glow effect in Photoshop is a simple process that can add a lot of visual interest to your images. Whether you are using the Hue/Saturation adjustment layer or the Layer Styles menu, you have complete control over the look and feel of your glow effect.
Experiment with different settings and see what works best for your images! The tools and options available in Photoshop allow for endless possibilities and creativity.
Download project zip file:
Deer image + Final image + PSD + Grain Texture
Creating a glowing effect in Photoshop is an easy yet impactful way to take your design from average to extraordinary. To begin, select the object of choice and make sure that it has an alpha channel (a transparent background). Then adjust the brightness, contrast, and saturation levels for desired specifications. Experiment with layer blend modes like “Soft Light” or “Glow” for added visual effects. After this step, add a Gaussian blur filter and increase the opacity until you achieve your preferred glow intensity. Finally, apply some color overlays to give more realism and complete the masterpiece! With these steps, anyone can create radiant artwork that will have heads turning!
Vibrant colors, ambient textures, and captivating light are all components of a successful digital painting. To create an ethereal work of art, begin by laying out the basics with a sketch or reference image. From here, build up the background using various blending methods like smudging, masking, and layering. After this step is completed, it’s time to add focal elements like characters, creatures, or objects. Then overlay some glowy light sources to bring life into the composition. And lastly, push the values to make the scene pop with luminescence and chroma! With these techniques, you can unlock your creative potential to deliver masterpieces that will mesmerize viewers.
Graphic design is an art form that requires technical skill and finesse. To hone this craft, it is important to understand the basics of manipulating pixels and blending layers. First, start by selecting a canvas size that best suits your design style and project type. Then create shapes and objects with vector editing tools like lasso or magic wand selection. Once you’re done constructing the initial layout, transition into painting mode with color swatches and gradients. Manipulate brush sizes to add details and refine edges. And apply various filters such as hue/saturation adjustment to achieve desirable viscidness and chroma effects. After this step, add a Gaussian blur filter and increase the opacity until you achieve your preferred glow intensity. Finally, apply some color adjustment to the canvas and your piece is ready to be shared with the world!
A proper understanding of design tools and workflow processes can help you unleash your imagination and produce magnificent works of art. However, this knowledge alone won’t guarantee success. You must infuse creativity into every step of your process – from concept development, to production optimization, to post-production finishing touches. For instance, use bold color palettes to create striking visuals that would draw attention; or choose an intricate grid structure to give a geometric flair; or combine different textures to evoke emotionality in viewers. Above all else, never forget to take risks! Be experimental and try new approaches so that you don’t get stuck in a creative rut.
There so many other ways to apply glow effect.
To create a glow effect in Photoshop, follow these steps:
- Open your image in Photoshop.
- Create a new layer above the layer containing your image.
- Select the Brush tool and choose a soft-edged brush.
- Set the brush color to a bright, glowing color such as yellow, white, or pink.
- Carefully paint over the areas of the image where you want the glow to appear.
- Change the blend mode of the new layer to “Screen” or “Add.” This will blend the glowing color with the underlying image, making the glow more subtle and natural-looking.
- To make the glow more intense, increase the opacity of the new layer.
- To make the glow less intense, decrease the opacity of the new layer.
- To adjust the size and shape of the glow, use the Eraser tool to remove some of the glowing color from the new layer.
- To add a halo effect around the glowing areas, create a new layer above the glowing layer and use the Brush tool to paint a thin, white halo around the edges of the glowing areas.
I hope this helps! Let me know if you have any questions.
People also ask
What is Outer Glow effect?
Adds a glow to the alpha channel of an image. The result is a glow around the outside of the image that leaves the interior unaffected. Adjust this filter using the parameter controls in the Filters Inspector: Radius: Sets the size of the glow.
What is inner glow effect?
The Inner Glow effect is used to add a color border to the inside of an object. It can be set to the edge or center of the object.
Where is the Glow effect in Word?
Click Home > Text Effects. Click the effect you want. For more choices, point to Outline, Shadow, Reflection, or Glow, and then click the effect you want.
How do you use glow shape effect?
Select the object that you want to format. Under Drawing Tools, on the Format tab, click Shape Effects or Text Effects. Click Glow > Glow Options.
What is luminous in art?
The definition of luminosity is something full of light, bright, or shining. In art, it refers to the illusion of light from within the painting. The use of light in a painting can effectively organize a scene and define detail. It can also help create emotion and convey a story.


